zenek213 - 13 Lip 2008, 23:27 Temat postu: Jak wyjąc pomarńczowe kierunki w lampach fiesty mk 5? Tak jak w tytule jak można wyjąc te nakładki pomarańczowe w lampie przedniej fiesty mk5? Próbowałem je wyjąc ale nie udało mi się nie chciałem niczego połamac ") wiec zrezygnowałem ale chcę jeszcze raz podejsc do tego i je wyjąc. wiec zrezygnowałem ale chcę jeszcze raz podejsc do tego i je wyjąc. 
Tomek - 11 Sie 2008, 18:12 ja rozklejalem lampe i normalnie wyciagniesz tylko musisz uwarzac. pozdro [ Dodano: Pon Sie 11, 2008 18:13 ] zobacz jak u mnie sa / i pomaluj sobe obrzezalampy na czarno sulos - 11 Sie 2008, 19:40 wyjmij i baj, baj dowodzie rejestracyjny 2smart - 11 Sie 2008, 19:52
Jak wstawisz takie żarówki to nic sie z dowodem nie stanie !! http://allegro.pl/item413...on_p21_21w.html Pozdr sulos - 11 Sie 2008, 20:04 stanie sie, poniewaz jest to ingerencja w reflektor, ktory to ma homologacje jako calosc. w tym przypadku ta homologacja jest nie wiecej warta od funta klakow 2smart - 11 Sie 2008, 20:19
a kto ci udowodni ze ingerowałeś w lampę jak nadal będzie miała znak homologacji na szkle ?? Jak lampy będą nadal świecić na pomarańczowo np dzięki takim żarówką to zabranie dowodu nikomu nie grozi.. Takie moje zdanie Pozdr Kacper - 14 Sie 2008, 19:53 i tu sie właśnie mija praktyka z teorią ") teoretycznie nielegalne, ale nikt do tego nie dojdzie, bo nikt nie bedzie wiedział czy to nie były jakieś lampy po liftingu, gdzie usuneli ten pomaranczowy kolor itd tylko musi to wygladac jak oryginał, a nie lampy uwalone silikonem na łączeniach teoretycznie nielegalne, ale nikt do tego nie dojdzie, bo nikt nie bedzie wiedział czy to nie były jakieś lampy po liftingu, gdzie usuneli ten pomaranczowy kolor itd tylko musi to wygladac jak oryginał, a nie lampy uwalone silikonem na łączeniach
sulos - 14 Sie 2008, 21:18 wprawdzie po angielsku... ale instrukcja "idiotoodporna" You will need: A hairdryer Star headed screw driver Flat headed screw driver Silvertec bulbs - bought at mini trailers (cheepest place so far.. under a tenner for the pair) and a can or coke or two for refreshments lol! Before: 
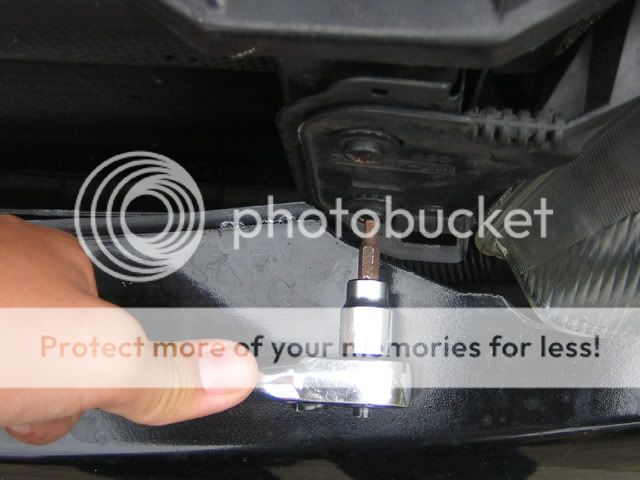
Step 1: Open the bonnet and remove the grill from in-between the headlights, these unclip from 4 clips.. 1 in each corner. it should just pop straight out. Step 2: Undo 3 star bolts on each light. These are how the light is kept in place. 1 is above the light (pictured below) 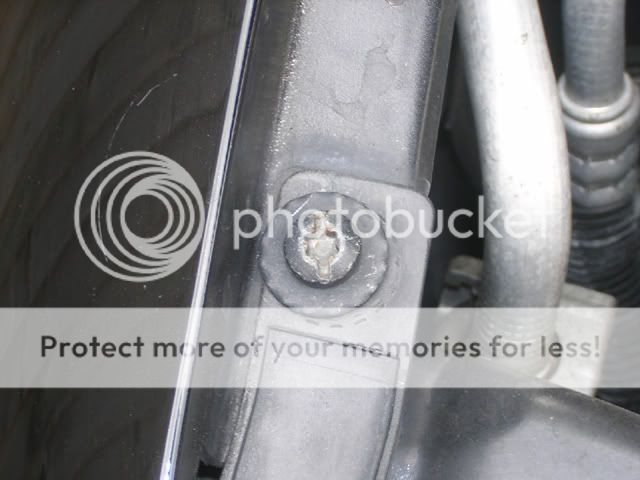
The other 2 are on the inside edge (picture below) 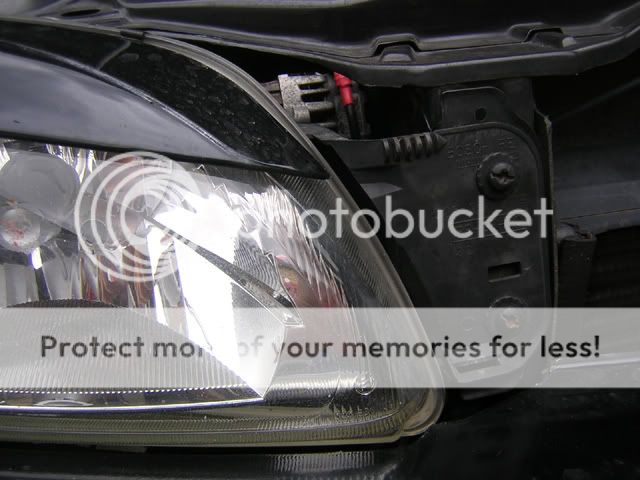
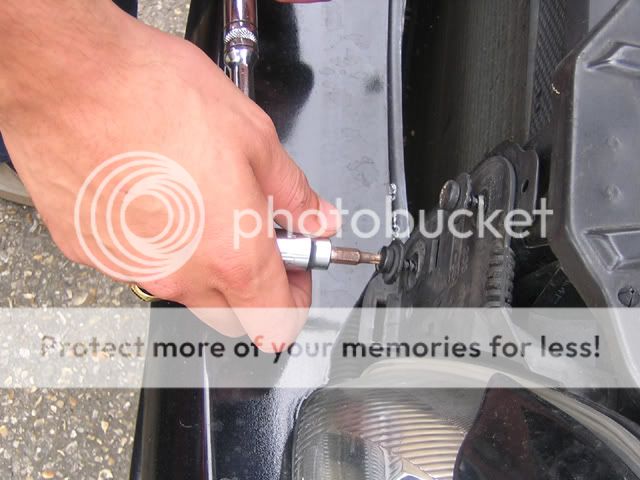
Once these are removed pull the light away from the chassis and there will be a clip to remove the electrics from the headlight. Simply suppress the black clip and it should just pop off 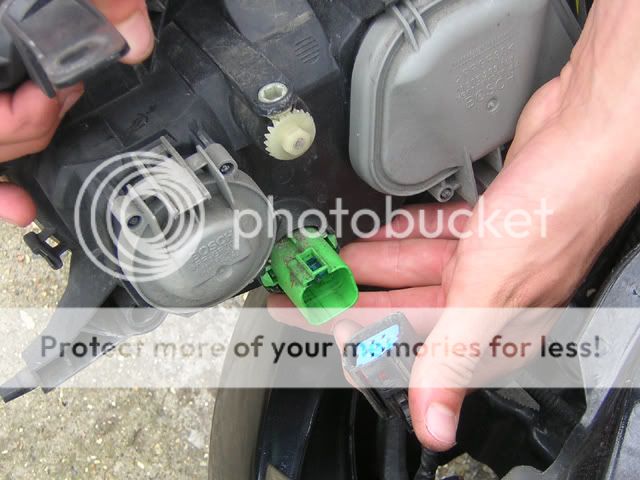
Step 3: Removing the lens First you will need to remove the clips which hold the lens in place.. this is fairly easy just make sure they don’t ping off somewhere.. you should be able to do this with a flat headed screw driver. 
Once the clips are removed you will need to locate the female of the house's hairdryer. You will need this the heat the glue which holds the lens in place. Slowly run the hairdryer (on hot!! LOL) over the glue until it becomes tacky enough to prise away. 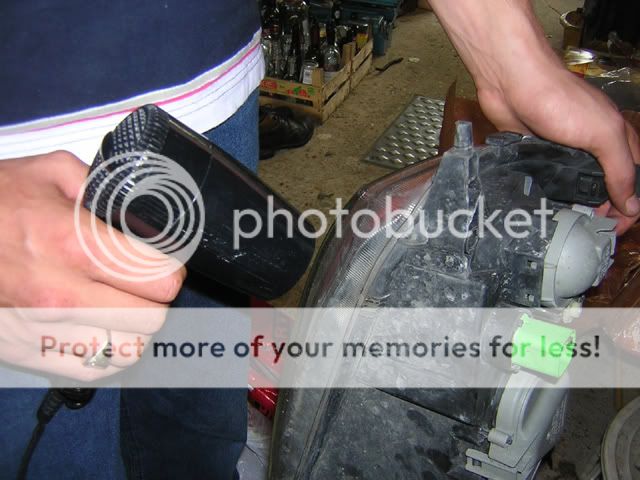
BE VERY CAREFUL WHEN PRISING GLASS! it has been to known to break before. We used a flat head screw driver gently wedged behind the lens to remove the glass 
It should begin to get easier once the first side is done and should just come away with a little pull 
Step 4: Removing the filter and replacing the bulb This is where you need to be very careful as the reflective coating behind the filter scratches very easily. Holding the filter in place are several small clips which we found came away quite easily with a small flat head screw driver being careful not to mark the light. 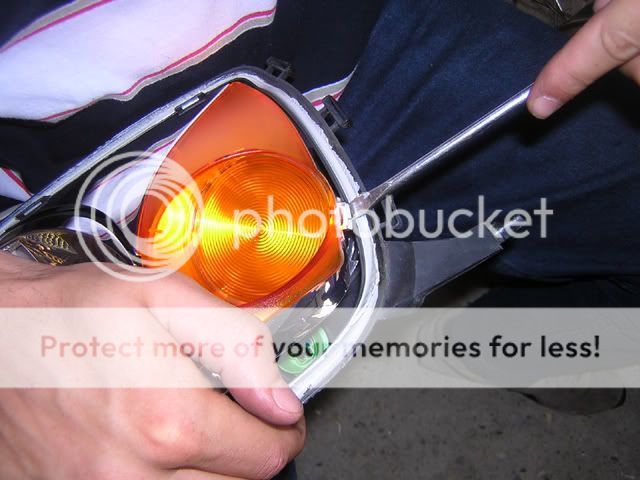
Once removed you can do what ever you like with these as they will not be needed again unless you really want them. Now simply remove the bulb with a twist and replace it with the silvertec bulbs. Step 5: putting it all back together again This is the easy bit..... heat the glue back up again with the hairdryer and until it goes all tacky again. 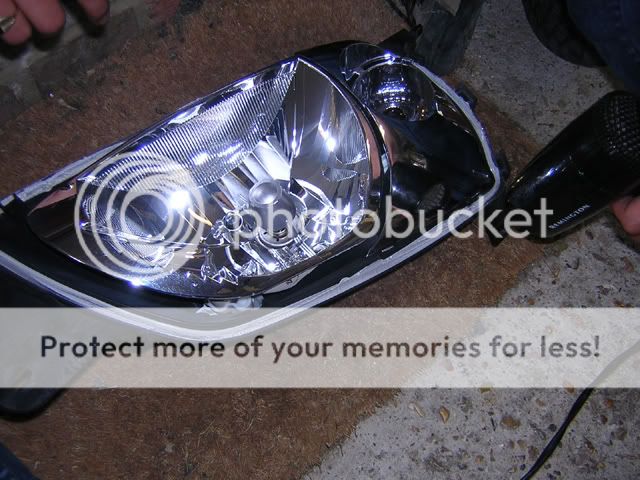
pick up the glass and press in back down onto light 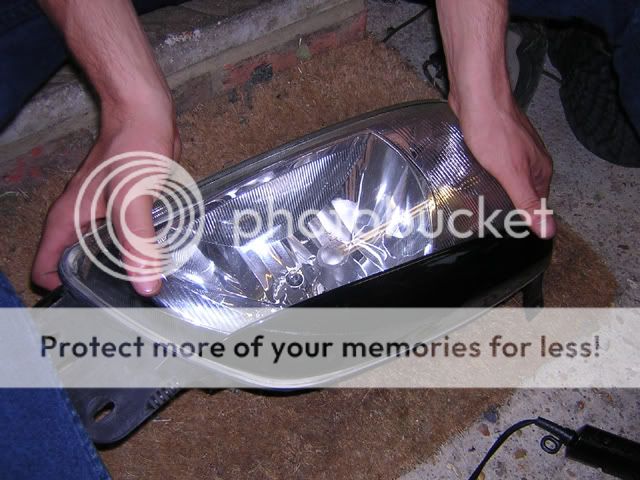
all that’s left to do is put the clips back onto the light and return the light to the car. 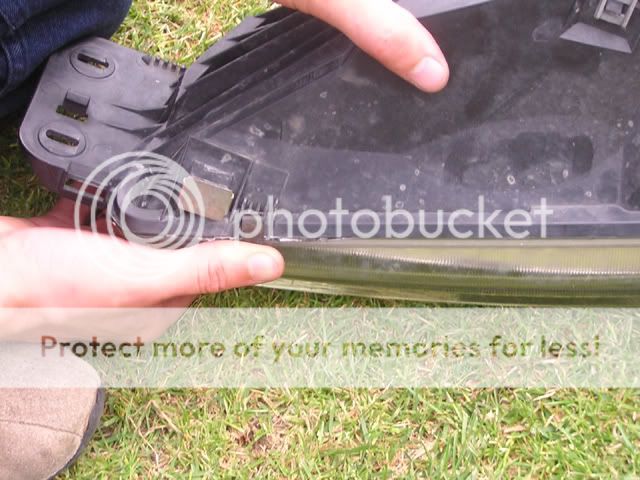
do make sure when putting the light back in you plug the electrics back into the light.. it goes in the same way it came out funnily enough. Now you should be able to stand back and admire your work.. such a simple mod makes the car look so much better.. Step 6: FINISHED!! TA DA!!  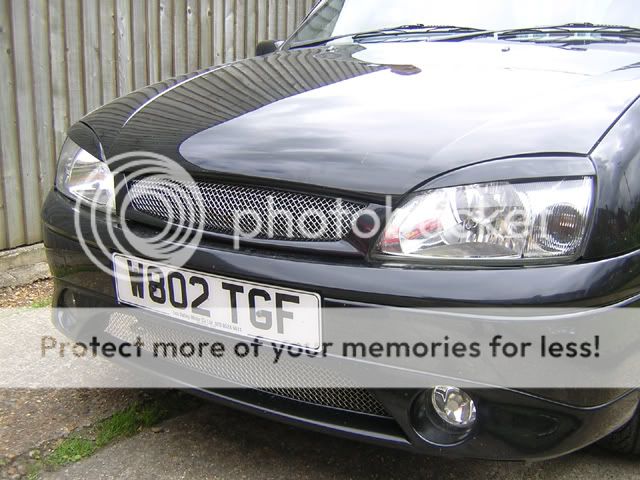
|
